1Installing the app
DisplayMode Menu isn't on the Mac App Store, it's downloaded directly:
- Download the latest release zip from the GitHub releases page.
- Extract the zip by double-clicking it.
- Move DisplayModeMenu.app to your /Applications folder.
2Opening it the first time
Releases are signed and notarized by Apple, so double-clicking DisplayModeMenu.app in /Applications opens it normally, no extra steps needed.
Still see a quarantine warning? This can happen if the app was copied manually rather than opened from the extracted zip. Clear it once from Terminal:
xattr -cr /Applications/DisplayModeMenu.appThen open the app normally. On first launch, the 🖥️ icon appears in your menu bar.
3Reading the menu bar dropdown
Click the 🖥️ icon to open the menu:
- Favorites: your configured resolutions, grouped per display.
- All Modes: a submenu per display listing every available mode, filtered by your minimum refresh rate.
- The current mode is highlighted in bold, blue font.
- Refresh Displays: forces a reload, useful after hot-plugging a monitor.
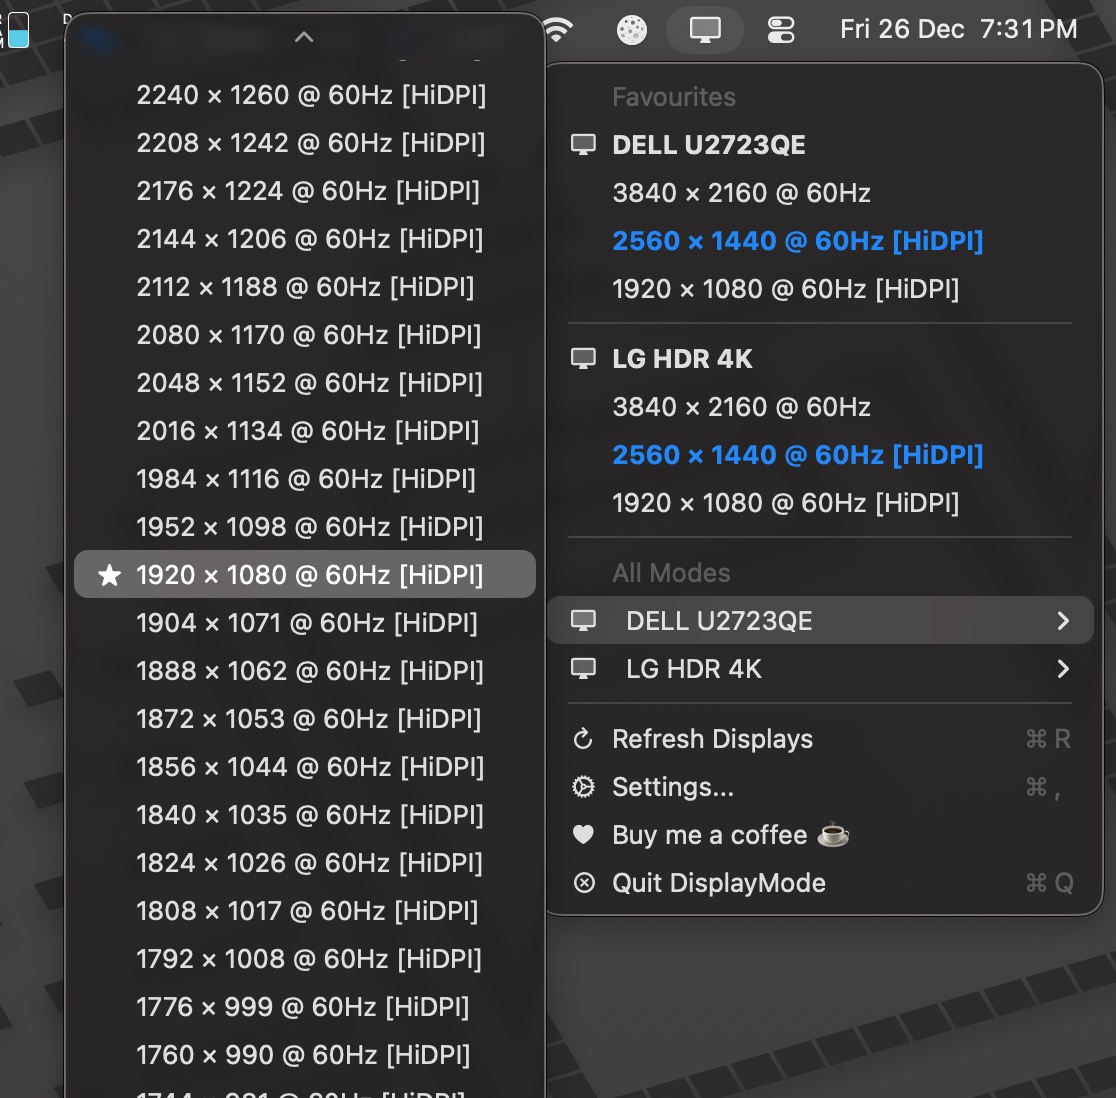
Click any resolution to switch to it. The menu automatically reflects the current display state every time you open it.
4Copying a display name
Click on a display's name in the menu to copy it to your clipboard, handy for targeting a specific display in a Shortcut.
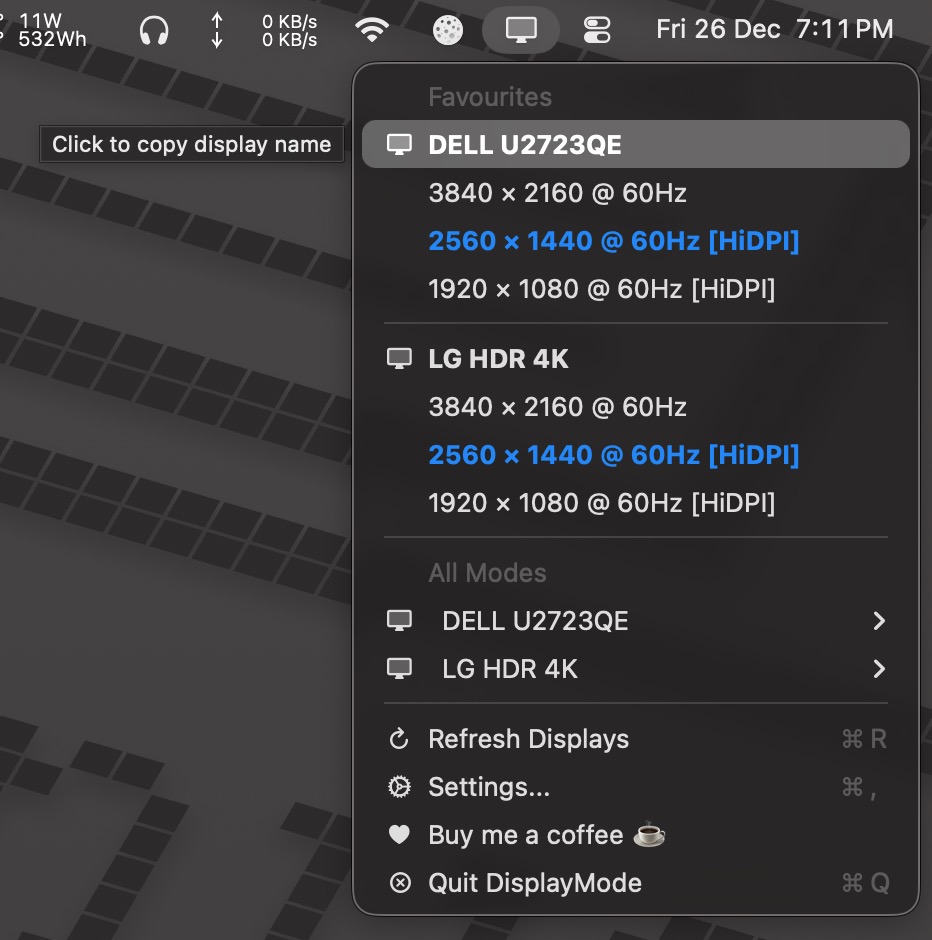
Notification permission. On first use, macOS will ask for notification permission to show a copy confirmation. You can allow or deny it, either way the clipboard copy still works.
5Configuring favorites & settings
Open Settings from the menu to customize:
- Minimum Refresh Rate: filters which modes appear in the "All Modes" list.
- Show Low Resolution Modes: include lower-resolution modes in "All Modes".
- Start at Login: launch the app automatically.
- Favorite Resolutions: one per line, in
width,height,refreshRate,hiDPIformat.
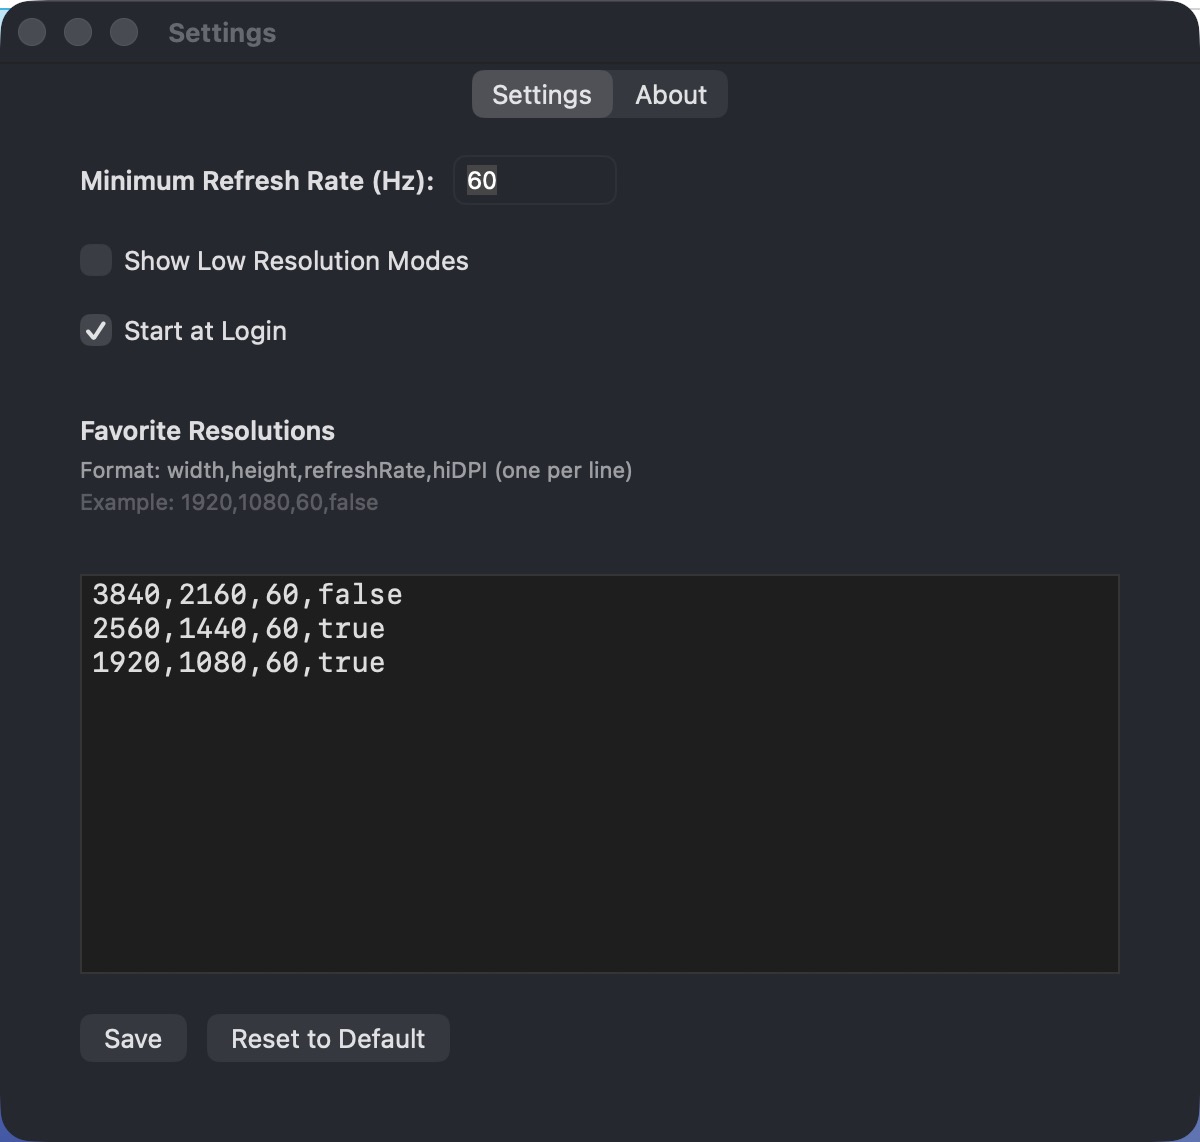
Click Save to apply, or Reset to Default to restore the 22 built-in resolutions.
6Setting up a Shortcut
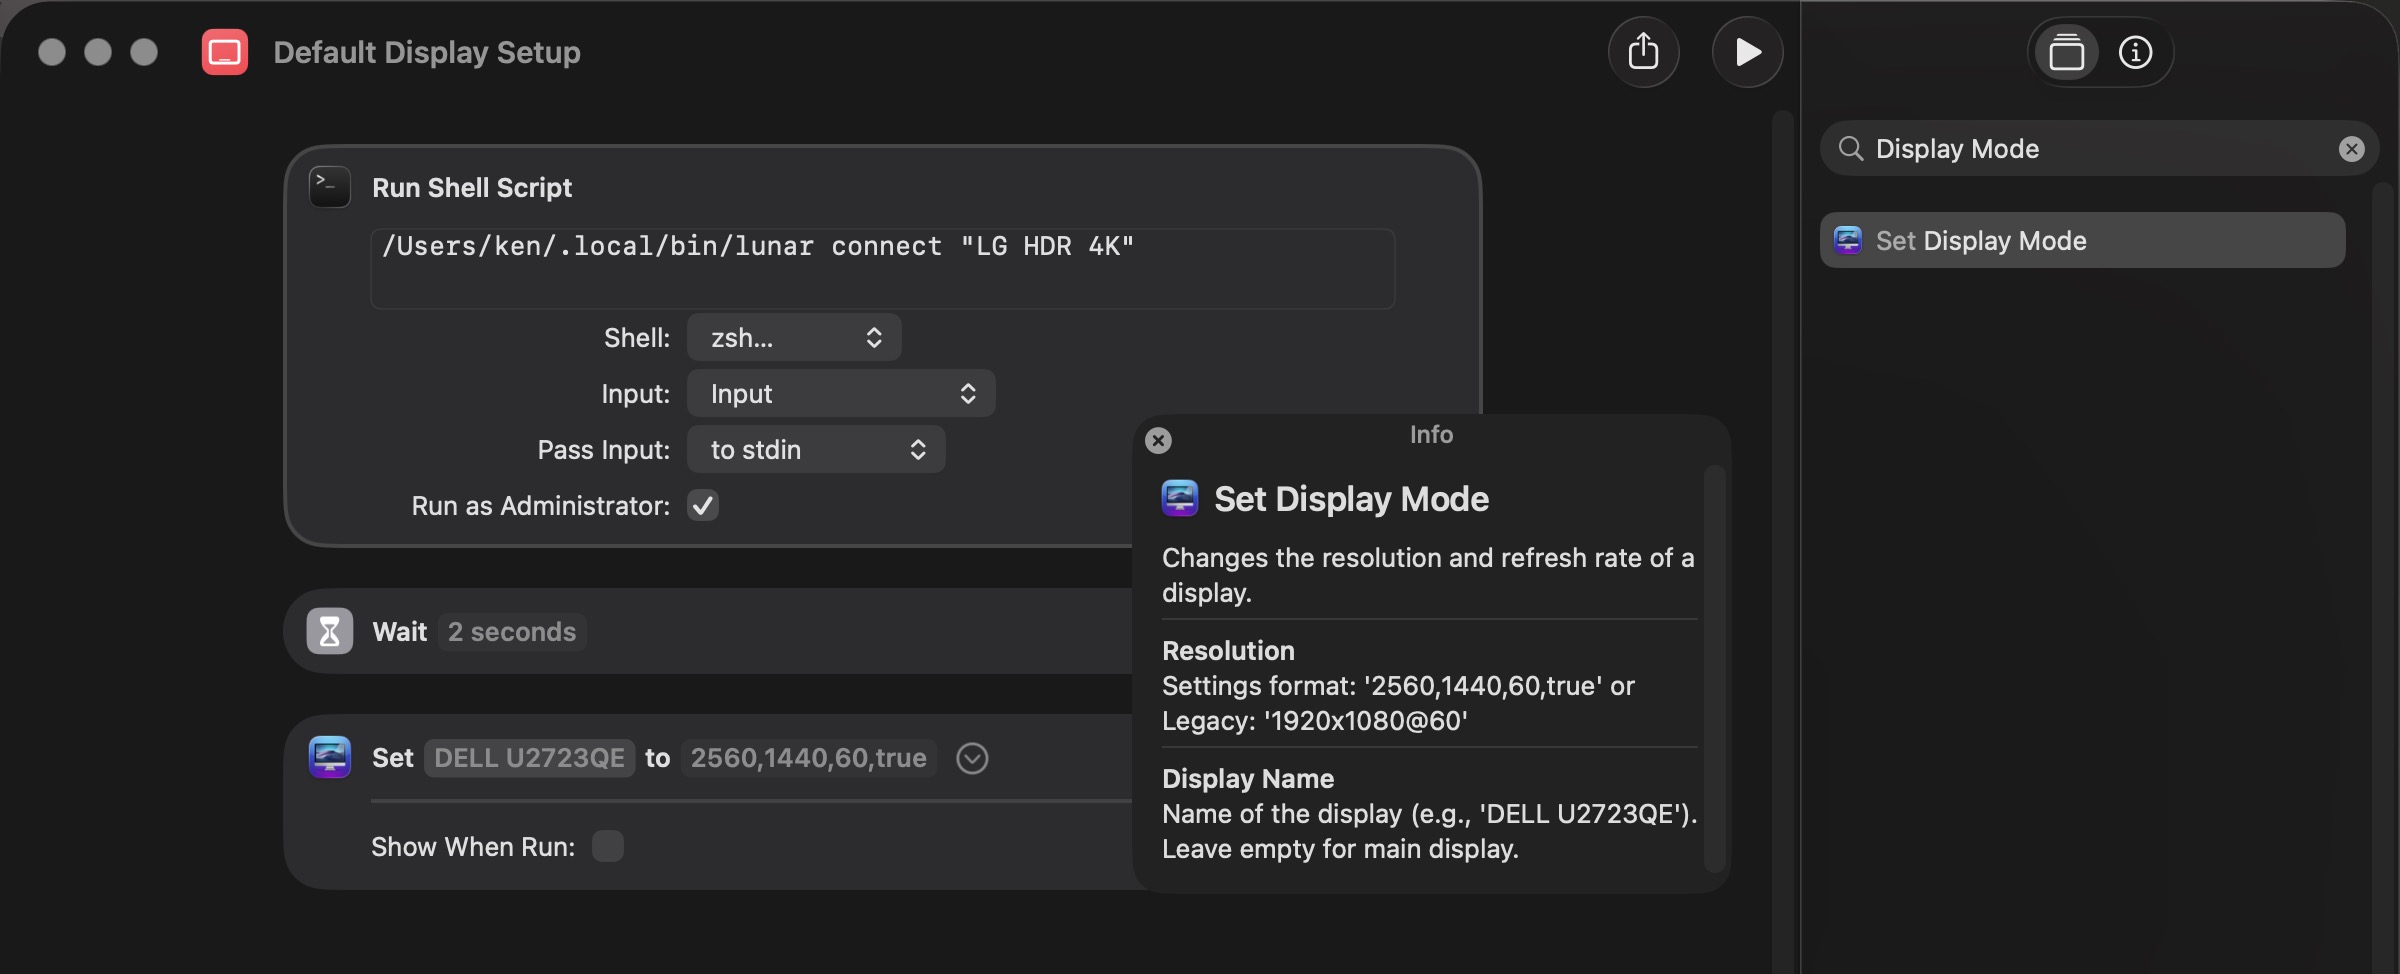
DisplayMode Menu registers a "Set Display Mode" action in the Shortcuts app:
- Open the Shortcuts app.
- Click + to create a new shortcut.
- Search for "Set Display Mode" and add it.
- Fill in Resolution (e.g.
2560,1440,60,true) and, for multi-display setups, Display Name. - Name the shortcut and optionally assign a keyboard shortcut in its info panel.
7Resolution formats
The Resolution parameter accepts two formats:
Settings format (recommended, copy/paste from the app)
width,height,refreshRate,hiDPI
2560,1440,60,true
Legacy format
WIDTHxHEIGHT[@REFRESH]
1920x1080@60
Display Name is optional: leave it empty for your main display (shown as "Main Display" in Shortcuts), or paste in a specific display's copied name for multi-display setups.
8Tips & troubleshooting
The app won't open at all
Releases are signed and notarized, so this is uncommon. If you see a quarantine warning, run xattr -cr /Applications/DisplayModeMenu.app from Terminal (see section 2).
My resolution didn't change
Check the format matches exactly, invalid formats show an error with examples. Also confirm the Display Name (if set) matches a currently connected display.
A new monitor isn't showing up
Use Refresh Displays from the menu after hot-plugging.
I only see a few modes in "All Modes"
Lower the Minimum Refresh Rate or enable Show Low Resolution Modes in Settings (see section 5).